
The first example is fine if all you want is file uploads. However, most people want to capture additional information on the form, such as a description, along with the file.
Normally, you can use ASP's Request.Form object to access these other elements on the form. However, when uploading files, you must change the Encoding Type to "multipart/form-data". The ASP Request.Form object does not understand data transmitted using this encoding type.
|
The FormEx object has replaced the Form object used in previous versions of |
Here is an example:
	<HTML>	<HEAD>
	<TITLE>Please Upload Your File</TITLE>
	</HEAD>
	<BODY>
	<form enctype="multipart/form-data" method="post" action="mformresp.asp">
	Enter description: <input type="text" name="descrip"><br>
	Enter filename to upload: <input type="file" name="f1"><br>
	<input type="submit">
	</form>
	</BODY>
	</HTML>
Mformresp.asp contains the following code:
	<%@ LANGUAGE="VBSCRIPT" %>
	<HTML><HEAD>
	<TITLE>Upload File Results</TITLE>
	</HEAD>
	<BODY>
	Thank you for uploading your file.<br>
	<% Set upl = Server.CreateObject("SoftArtisans.FileUp") %>
	<% upl.SaveAs "C:\temp\upload.out" %><BR>
	Your description is: '<%=upl.FormEx("descrip")%>'<BR>
	Total Bytes Written: <%=upl.TotalBytes%>
	</BODY>
	</HTML>
In this case, the definition of the form still uses ENCTYPE="multipart/form-data", but now there is an additional form element containing a text box.
Enter description: <input type="text" name="descrip"><br>
Let's look at the form's processing (mformresp.asp).
There is still the same creation of an instance. However, in this case we are referring to the form elements (description) explicitly by name.
	<% upl.SaveAs "C:\temp\upload.out" %><BR>
	Your description is: '<%=upl.FormEx("descrip")%>'<BR>
Like the Request.Form syntax, we use upl.FormEx("name-of-the-form-element") to refer to the value of the form element.
Since there is only a single file element, we do not have to explicitly specify which one we want to save.
You can use this same mechanism to access all of your form elements, such as text boxes, radio buttons, checkboxes, selection boxes, etc.
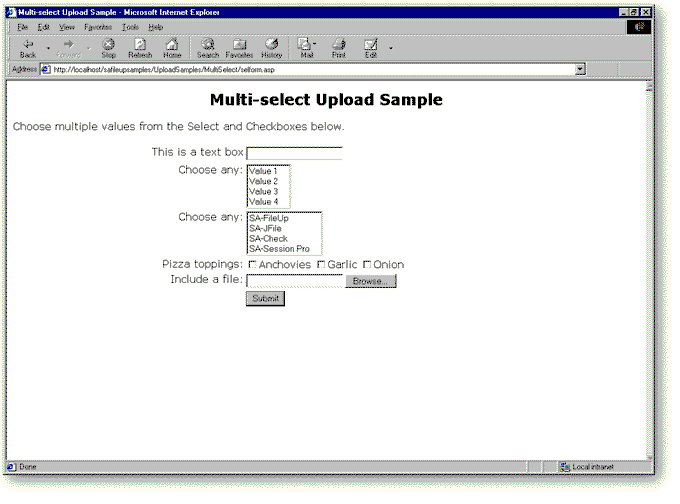
The following figure shows how you could put these form elements together into an application. To see the
complete application illustrated in this figure, see the Multi-select uploading sample in the Samples directory.
(For more information about samples provided with
What if you wanted to Add a Second File?
| Previous Page | Next Page |